Saturday, November 14, 2009

Vegetable Melts on Garlic Toast


Vegetable melts can be served as a scrumptious appetizer, as a two-part meal with a soup, or as a vegetarian entree all by themselves. As you can see from the picture, when I made these for my family, I omitted the eggplant and olives, and used heirloom tomatoes rather than Roma tomatoes. I will include the directions if you would like to use the eggplant and olives, and the recipe is the same for whatever kind of tomatoes you use. Either way, these veggie melts will appeal to vegetarians and nonvegetarians alike.

1 eggplant (aubergine), about ¾ lb
salt
4 large, firm ripe Roma (or heirloom) tomatoes, about 1 lb
4 tbsp olive oil
1 cup thinly sliced sweet onion, such as Maui or Vidalia
5 oz spinach leaves, stems removed, about 4 cups loosely packed
1 tsp minced garlic, plus 1 clove halved
1 tbsp finely chopped pitted Kalamata olives
freshly ground pepper
4-6 slices sturdy whole grain bread
Basil leaves, thinly sliced
shredded mozzarella cheese

Peel the eggplant and cut crosswise into about ½ inch thick slices. Sprinkle both sides with salt and lay them in a colander set over a plate. Pay a second plate on tip to weigh them down and let stand for 1 hour. Rinse slices and pat dry with paper towels.
Preheat the oven to 425 degrees F. Halve the tomatoes lengthwise and remove the seeds. Arrange them, cut side up, in a baking pan and drizzle with olive oil. Arrange the eggplant on a baking sheet and brush both sides with olive oil. Place both pans in the oven. Roast the eggplant for 15 minutes, flip the slices, and then roast until lightly browned and soft, about 10 more minutes. Remove from the oven. Meanwhile, roast the tomatoes, flipping them and rotating the pan so they cook evenly, until the skins are shriveled and caramelized, 35-45 minutes. Remove from the oven, cover with aluminum foil, and let the tomatoes cool. Uncover and peel off any skins that have loosened. Reduce oven temperature to 350 degrees F.
Place a large frying pan over medium heat and heat the olive oil, then add the onions and toss to coat. Sprinkle with 2 tbsp water, cover, reduce the heat to low, and cook until the onion is wilted and tender, about 8 minutes. Then uncover the pan, stir in the minced garlic, and cook for 1 minute. Add the spinach leaves and toss to distribute evenly. Re-cover and cook until the spinach is wilted, about 5 minutes. Remove from the heat and add olives, and salt and pepper to taste. Stir to mix.
Rub 1 side of each bread slice with the cut side of a garlic half. Place the slices on a baking sheet, brush evenly with olive oil, and bake until toasted, about 12 minutes. Remove from the oven and preheat a broiler, or the oven to 500 if you don't have a broiler.
Make a layer of the spinach on each of the toasts, dividing it evenly. Top with 1 or 2 slices of eggplant, slightly overlapping them if need be. Then add 2 roasted tomato halves, sprinkle evenly with basil. Arrange a layer of cheese on top of each toast. Put the pan into the broiler or oven for 4 minutes or until the cheese is hot and bubbly.

Recipe from: Williams-Sonoma, Essentials of Healthful Cooking

Roasted Tomato Bisque


We have now reached fall, and are well on our way to the cold, cold winter. We begin to seek warm and hearty dishes, rather than the fresh, crisp dishes of summer. This tomato soup is the perfect soup for winter. The tomatoes are roasted in the oven for 30 minutes, concentrating their flavor and giving the bisque a full-bodied taste without the cream.

2½ lb Roma tomatoes, halved lengthwise
salt and pepper
about 1 tsp olive oil
1 small yellow onion, chopped
1 small garlic clove
1 tsp sweet paprika
sour cream
chopped fresh flat leaf parsley

Preheat the oven to 425 degrees F. Cover 1 or 2 medium sized baking sheets with aluminum foil. Arrange the tomatoes, cut side up, on the prepared sheets. Sprinkle evenly with about 1 tsp salt and several grinds of pepper. Roast until the tomatoes are soft, but still hold their shape. About 30 minutes.
In a large, heavy saucepan over medium-high heat, warm the olive oil, careful not to heat it too much. Add the onion and garlic and saute until translucent, about 3 minutes. Reduce the heat to low, cover, and cook until the onion releases its juices, about 8 minutes. Stir in the paprika. Raise the heat to medium-high and add the tomatoes and any juices collected from the pans. Pour in 1 cup water. Reduce the heat to medium, cover, and simmer until the vegetables are very soft, about 25 minutes.
Remove from the heat and, working in batches, pass the soup through a food mill fitted with the medium disk placed over a bowl. Alternatively, pass through a fine-mesh sieve placed over a bowl, pressing it with the back of a wooden spoon. If you don't have either of these, you can also blend it in batches in either a blender or food processor.
Return the soup to the pan. Stir in salt and pepper to taste and reheat over medium heat. Once you are ready to serve, ladle soup into bowls and top with a dollop of sour cream and garnish with fresh parsley.

Recipe from: Williams-Sonoma, Essentials of Healthful Cooking

Saturday, November 7, 2009

Back In Business!

Hello Everyone!
Due to some major technical computer issues, I have not been able to post for a LONG time! However, the problem has been solved, and now I am looking forward to many, many more posts to come. In the mean time, I have not slowed down on cooking and baking. I have made countless dinners and desserts that there is almost no hope for catching up on posts for, including cupcakes, biscotti, salads, ciabatta bread, and many healthy dinners incorporating quinoa, a hearty, vegetarian protein. I will make them again, and I will post them when I do. In the meantime, eat well, have fun, and I look forward to the next post!

Carrie.

Sunday, September 13, 2009

Black and White Cookies


Black and White cookies are decadent and festive, and a New York specialty. They are super soft and cakey with the perfect slight crisp of icing on the top. Making bite-size versions of black and white cookies are perfect for parties- and for those who have trouble deciding between chocolate and vanilla. These cookies have both!

cookies:
1¼ cups flour
½ tsp baking soda
¼ tsp salt
6 tbsp butter, room temperature
½ cup sugar
1 egg
½ tsp vanilla extract
½ cup low fat buttermilk

icing:
2 cups powdered sugar
1 tbsp plus 1 tsp light corn syrup
2½ tsp fresh lemon juice
¼ tsp vanilla
1 tbsp water, plus more if needed
1 tbsp unsweetened cocoa powder

Preheat oven to 350 degrees. Line baking sheets with aluminum foil and whisk together flour, baking soda, and salt into a bowl.
Beat butter in a large bowl until creamy. Add the sugar and beat until it is pale colored and fluffy, about 2 minutes. Mix in the egg and vanilla until thoroughly combined and fluffy. Mix in the flour in 3 batches, alternating with the buttermilk.
Roll tablespoons of dough into balls and place on the lined sheets about 2 inches apart. Bake the cookies, rotating halfway through for about 10 minutes. Let cool completely before icing.
Whisk powdered sugar, corn syrup, lemon juice, vanilla, and the water in a small bowl until smooth. Add more water if needed to achieve a consistency slightly thicker than honey. Put half of the icing in a separate bowl and add the cocoa powder to one of the halves. Add more water if needed. Spread white icing on one half of the cooled cookies and chocolate icing on the other half and let stand until the icing has set.

Recipe from: Cookies by Martha Stewart

Tuesday, September 8, 2009

Bamboo Rice


I was wandering around the grocery store yesterday when I found myself in the bulk food section. I was looking over the various fruit and nut mixes when something caught my eye- something jade colored and translucent, like little green pearls. I approached these gems and looked at the label, which read: Bamboo Rice. Out of sheer curiosity, I grabbed a bag and filled it to the top.
I had actually never heard of bamboo rice before yesterday. It looks a lot like sushi rice in that it has a very short, round shape. In the picture, the color of the rice is somewhat washed out- so you can't really see how beautifully green it is. It is slightly sticky and chewy, again like sushi rice.
I read in an article I found about bamboo rice that some sushi chefs do use bamboo rice in the place of regular sushi rice to play off the colors of the fish. Imagine a sushi roll with a dark seaweed border, vibrant green rice, and bright pink tuna in the middle. Beautiful.
Bamboo rice is cooked by boiling 1.5 cups of water per 8 oz bamboo rice. Add a pinch or two of salt depending on your taste. Once the water is boiling, add the bamboo rice and return to a boil. Stir the rice to keep it from lumping together and bring it down to a simmer. Cook, covered or with the lid cracked, for 10-12 minutes or until all the water is absorbed. Fluff with a fork and serve.

Sunday, September 6, 2009

Tiramisu


Most people would agree with me that there's nothing better than a 3 or 4 day weekend. It hardly ever happens, but thats what makes it so special. To me, three day weekends mean sleeping in and cooking (what else?). This time I decided that I wanted to cook something not just difficult and time consuming, but something that was a trophy in and of itself. This recipe for tiramisu by Wolfgang Puck was exactly what I was looking for. There is no store-bought sponge cake or pre-made mascarpone cream. Every part of this recipe is homemade, which makes it feel and taste that much more comforting.

Ladyfingers:
6 eggs, separated
½ cup sugar, separated into ¼ cups
1 cup sifted cake flour
melted butter, for brushing
flour, for dusting pan

Mascarpone Cream:
6 egg yolks
1 cup sugar
¼ cup Marsala Wine
¼ cup brandy
2 pounds mascarpone cheese

Espresso Syrup:
1 cup espresso, hot
3 tbsp brown sugar
1 tbsp granulated sugar
1 tsp lemon juice
1 tsp vanilla
½ cup grated bittersweet chocolate

Directions:
Ladyfingers:
Preheat oven to 350 degrees F. Butter a 12 by 16 inch baking tray and sprinkle with flour.
In a mixing bowl, whip the egg yolks with ¼ cup sugar until ribbony and light in color. Reserve. In another mixing bowl, whip the egg whites to soft peaks- when you lift the beaters out of the whipped whites, they stand and droop. Slowly add the remaining ¼ cup sugar and whip until they develop medium peaks- the whites stand and droop a little, but are not sharp. Sift the flour again and, with a rubber spatula, fold half of the flour into the yolk mixture. Fold in ½ of the of white mixture then fold in the remaining ½ four mixture. Lastly, fold in the remaining ½ egg white mixture. Pour the batter into the prepared baking tray and, with an offset spatula, carefully spread the batter to evenly fill the tray. Bake for 12 to 15 minutes until the ladyfingers are golden brown and start to pull away from the edges of the pan. Remove from the oven and allow to cool to room temperature.
Mascarpone Cream:
In a medium bowl, whisk together the egg yolks and sugar, then add the Marsala and brandy. Place over a double boiler and cook until the mixture reaches 160 degrees, stirring often. Continue to cook mixture for about 5-10 minutes, or until the mixture becomes a thick paste, called a sabayon. Remove from the double boiler and cool mixture over an ice bath, until room temperature. Whip the mascarpone cheese to soft peaks. Fold in the cooled sabayon until well incorporated. Keep cooled.
Espresso syrup:
Brew fresh espresso. To 1 cup of hot espresso, add the brown sugar, granulated sugar, lemon juice, and vanilla. Stir until dissolved.
To assemble the tiramisu:
Divide the sheet of ladyfingers into 2 (8 by 10-inch) sheets. Divide espresso syrup into 2 portions. Divide the mascarpone cream into 3 portions. Spread the first portion of the mascarpone cream at the bottom of a deep (preferably glass) mold topped with the first sheet of ladyfingers. Pour 1 portion of espresso syrup on to the layer of ladyfingers until soaked. Repeat process. Lastly, top with the remaining mascarpone cream and cover with grated chocolate. Cover mold and refrigerate at least 2 hours before serving.
*You can assemble and portion out the tiramisu according to however big or small your mold is*

Tuesday, August 25, 2009

Explanations of the Previous Recipe: Anadama Bread

As I mentioned in the previous post, I recently purchased and read through The Bread Baker's Apprentice by Peter Reinhart. Having and reading a cookbook with so much valuable information makes it necessary to include a post dedicated to further explaining bread, the recipe below, what some steps are, why we do them, and the reasoning behind them. First off, there are conflicting stories behind the name of this bread, but I am going to tell my favorite. Secondly, I will explain the importance of being specific about the type and amount of flour and yeast. My third explanation will be about the "windowpane test", its importance, and what to look for. Lastly, I will explain how to correctly shape your dough into loaves.

There are many different stories of the origin of the name, Anadama. My favorite is told by Judith and Evan Jones in their bread book, The Book of Bread. There was a man from Rockport, Massachusetts who was upset with his wife, Anna, for not only leaving him for another man, but leaving him with nothing more than a pot of cornmeal mush and some molasses. The angry husband tossed the mush and molasses together with some yeast and flour while muttering to himself "Anna, damn 'er!" Voila! The creation of Anadama bread.
While baking, many people pay far less attention to the type of flour they are using than they should be. This is a huge mistake because, if you are using a different type of flour than your recipe calls for, your dough will probably come out far too dry or far too sticky- unless you can correctly adjust the amounts. This is because some grains are much more dense and potent than others. Also, the amount of times wheat is sifted at the mill from its original state also changes the amount of water it absorbs. There are whole wheat, clear (once sifted), and patent bleached or unbleached flours (twice sifted) and, like all other grains, each of absorbs more or less water than the others. For instance, 1 cup of cornmeal, 1 cup of semolina flour, 1 cup of pastry flour, 1 cup of all-purpose flour and 1 cup of whole wheat flour all absorb different amounts of water.
Similar to flour, the type of yeast you use also makes a noticeable difference in the bread you are baking. The recipe below calls for instant yeast because it is more concentrated than fresh or active dry yeast, it has a longer shelf life, and it can be added directly to the flour instead of having to hydrate it first. Basically, this means buying less, using less, and fewer steps during baking. I am all for simplifying the baking process so instant yeast is my type of yeast! However, if you have to use active dry or fresh yeast, they can be easily substituted using the following formula:
1 part fresh yeast = 1/2 part active dry yeast = 1/3 part instant yeast=1 part fresh yeast
With this formula, you shouldn't need to weigh your yeast. Measuring should be enough. Flour, however, needs to be weighed on a kitchen scale. If you enjoy baking and do not have a kitchen scale, please pick one up at Target. They are fairly inexpensive and well worth it. My scale is by Michael Graves, and it measures to the 1/8 oz. It is also battery powered which is extremely convenient because I like to spread everything out and move about my kitchen- and now I can take my scale with me!
You measure flour different than anyone else. One cup of flour will weigh slightly different than another persons'. If you strictly go by this way of measuring, you may have dough that is much too dry or much too wet and in desperate need of sometimes a whole cup of flour more or less. This can be sidestepped by weighing your flour to guarantee accuracy of the amount you are using. Another, and the best and most reliable way to know, is by feeling your dough. By the texture of your dough, you can get a feel (pun intended) for how much more flour you need to incorporate, regardless of how much you have already used. I usually like to add less flour than a recipe calls for, and then add more as needed. It is always easier to add more than have to deal with the opposite problem- too much flour. Believe it or not, the weather and where you live also make a difference on the amount of flour you need. If it is a humid day or you are at low altitude, for example, you will probably need more flour than if you were up in the mountains somewhere with no humidity. The moral: a recipe is nothing more than a guideline. Follow the fundamental instructions, but in the end, it always comes down to your intuition.
The "windowpane test" is the most reliable method to determine when gluten development is sufficient or, in other words, when you can stop kneading the dough. This method is performed by cutting off a small piece of dough from the larger batch and gently stretching it, pulling it out to see if it will hold a paper-thin membrane that will let light through. If the dough falls apart before it makes the "windowpane", that means the gluten has not yet fully bonded to one another, and you need to continue kneading the dough for a couple minutes and retest.
Finally, after all the work you have put into mixing, fermenting, and kneading your beautiful dough, you need to know how to mold this block of clay into a work of art. To shape your dough into a sandwich loaf, like the recipe below, start by dividing it according to your recipe, if necessary. Flatten the first piece of dough with your hands into a rectangle about 5 inches wide and 6-8 inches long. From the short side, roll up the dough, one turn at a time, and pinch the crease with each rotation to strengthen the surface tension. As you continue rolling and creasing, the loaf will spread out to about 8 or 9 inches long. Pinch the final seam closed with the back of your hand or thumbs. Then, place your loaf, seam down, into the lightly oiled loaf pan.

There you have it. Unless you are as crazy about baking as I am, you have just read more information than you ever wanted to know about dough. Happy Baking!

Anadama Bread


Like any cook, I am a recipe fanatic. I have subscriptions to way too many cooking magazines but always end up buying just one more that I don't have whenever I go grocery shopping. Not surprisingly, one of my favorite afternoon activities is taking a trip over to Barnes and Noble and spending hours looking at all the cookbooks, only wishing I had the money to purchase all of them. However, the last time I ventured to the cooking section, I decided that I had gone long enough without buying a new cookbook. I walked out of the store, fully satisfied, with an ice cream recipe book and, my new bible, The Bread Baker's Apprentice by Peter Reinhart. I have never seen a cookbook that teaches its readers quite like this one does. The first 101 pages are packed with priceless information about everything from shaping and proofing equipment to the chemistry behind different types of yeast and flours. If you are interested in learning not only how to bake great bread, but also the science behind it, I would more than recommend The Bread Baker's Apprentice.

Soaker:
1 cup (6 oz) cornmeal
1 cup (8 oz) room temperature water

Dough:
4½ (20.25 oz) unbleached bread flour
2 tsp (.22 oz) instant yeast
1 cup (8 oz) lukewarm water- 90 to 100 degrees F
1½ tsp (.38 oz) salt
6 tbsp (4 oz) molasses
2 tbsp (1 oz) shortening or unsalted butter, room temperature

The day before making the bread, make the soaker by combining the cornmeal and water in a small bowl. Let sit overnight at room temperature. This step helps to activate the enzymes in the cornmeal to release the sugars trapped in the starch. It also softens the cornmeal.
The next day, combine 2 cups (about 10 oz) of the flour, the yeast, the soaker, and water in a mixing bowl or a bowl of an stand mixer. Cover the bowl with a towel and let it ferment for about 1 hour, or until the sponge begins to bubble- whichever comes last. This is an important step in developing the flavor of the bread: the longer it ferments, the richer and deeper the flavor. Add the remaining 2½ cups of flour, salt, molasses, and shortening and stir (or mix on low speed with the paddle attachment) until the dough forms a ball. Add water or flour to make a soft and slightly sticky dough.
Sprinkle flour on the counter and transfer the dough to the counter and begin to knead the dough. Alternatively, you could mix the dough on medium speed in your standing mixer with the dough hook. Sprinkle more flour as needed to make a tacky, but not sticky, dough. The dough should be firm but supple and pliable. It will make about 10 minutes of kneading to accomplish this. You know you are done when your dough passes the windowpane test (check the next post for an explanation). When in doubt, mix a little longer. It is almost impossible to over-knead dough.
Lightly spray a bowl with oil and transfer the dough to the bowl, rolling it around to coat it with oil. Cover with plastic wrap and let the dough ferment and rise for about 90 minutes, or until it at least doubles in size.
Remove the dough from the bowl and divide it into 3 equal pieces. Shape the dough into loaves (also check the next post for an explanation) and place in oiled 8.5x4.5 bread pans. Lightly mist the tops with oil and cover the tops with plastic wrap.
Proof at room temperature for 90 minutes, or until the loaves crest fully above the tops of the pans. Preheat the oven to 350 degrees F, with the oven rack in the middle. Remove the plastic wrap and place the pans in the oven. Bake for 20 minutes, rotate the pans, and then bake for 10-30 more minutes until the top, sides, and bottoms of the loaves are golden brown, depending on the oven temperature. They should make a hollow sound when thumped on the bottom.
Remove the loaves immediately from the pans and cool on a rack for at least one hour before slicing or serving.

Thursday, August 13, 2009

Chocolate Chip Cookies


I've had this blog for a few months now, and I was looking through my pages when I realized that I still haven't posted a recipe for chocolate chip cookies! We all have our favorite recipe, and why haven't I posted mine? The reason for this is that everyone- seriously, everyone- loves chocolate chip cookies. I have never met a person who doesn't love one of these- warm and goey- with a cold glass of milk (well, most people enjoy the milk part). Because of this passion that all people have for chocolate chip cookies, I couldn't just post any old recipe on here, especially not the one printed on the back of Nestle Tollhouse chocolate chips (paah-lease!!!). I had to perfect my recipe- take my favorite aspects of each fabulous cookie I eat and mold them together to create a recipe that is simply unbelievable. Enjoy!

2¼ cups all purpose flour
½ tsp baking soda
14 tbsp butter-flavored vegetable shortening
¾ cup white sugar
¼ cup packed light brown sugar
½ tsp salt
2 tsp vanilla extract
2 eggs
2 cups semi-sweet, or milk chocolate chips

Preheat oven to 350 degrees, putting one rack in the bottom third of the oven. Line baking sheets with aluminum foil.
Whisk flour and baking soda together in a medium bowl.
Beat the shortening and the sugars together in a bowl until they are light and fluffy. Reduce speed to low and add the eggs, salt, and vanilla; mix until the batter has turned paler and is fluffy. Then, gradually add the flour into the batter and mix until just combined. Then stir in the chocolate chips.

Scoop about two tablespoon-sized balls of dough and roll between your hands. Then place them on a sheet about 2 inches apart. Then press each ball of dough a bit and turn it into a disk. Bake the cookies until the edges just start to brown, about 10-13 minutes, depending on cookie size. Cool on wire racks and enjoy!!

Recipe is my own.

Saturday, August 8, 2009

Sugar Cut-Out Cookies


I met so many people from all over the country at the summer program I just got home from, but being so far apart from each other, it's going to be hard to stay in touch. I baked these cookies to send to my friends that live in states far away from Minnesota. They are sturdy enough to hold up while they are shipped and the frosting hardens, that way it won't smear all over the box and the other cookies. As durable as they are, these cookies are also damn cute. If you are sending a care package to a loved one in college or a friend who lives far away, I would definitely recommend packing these inside.

cookies:
2 cups all-purpose flour
½ tsp baking powder
¼ tsp salt
8 tbsp room temperature butter
1 cup granulated sugar
1 egg
1 tsp vanilla

icing:
1½ cups confectioners sugar
3-4 tbsp milk, water, or lemon juice

In a large bowl, whisk the flour, baking powder, and salt together. Beat the butter and sugar together in a separate bowl until light and fluffy. Beat in the egg and vanilla. Gradually add the dry ingredients and beat until combined. Divide the dough in half, wrap in aluminum foil, and refrigerate for at least 30 minutes.
Preheat the oven to 325 degrees, with racks in upper and lower thirds. Line baking sheets with aluminum foil, and remove one disk of dough from the refrigerator; let stand 5 to 10 minutes. Roll out about 1/8 inch thick on a lightly floured surface with a lightly floured rolling pin. Cut out shapes with lightly floured cookie cutters and place on baking sheets with a spatula. The cookies hardly spread out so there is no need to give them more space than a half an inch from each other. Bake, rotating the sheets halfway through, until the edges are golden, 8-12 minutes depending on the size of the cookies. Let the cookies cool completely before icing them. If the cookies are still hot, the icing will run off the cookie.
Sift the confectioners sugar into a bowl, then whisk in the milk, water, or lemon juice one tablespoon at a time until the icing is smooth and thick enough to coat the back of a spoon. If too thin, whisk in more sugar. If too thick, add more liquid. Spread over the cookies and add other decorations.

Recipe from: Food Everyday. Cookie Edition, by Martha Stewart

Thursday, August 6, 2009

Vegan Scones


For the past five weeks, I was at Northwestern University attending a summer theatre program. So far, it was the best experience of my life: I learned so much about life and met so many wonderful people. For the first time in my life, the majority of my friends were or had been vegetarian. One of my closest friends, Lily, was a vegan. I was vegetarian for a little over a year, but that was all the exposure I had ever had to that kind of lifestyle. I was so intrigued by the choice she made and how she went about her life as a vegan. It was inspiring to see her be proactive about animal respect and it made me want to follow in her footsteps. Thank you Lily. Hopefully you will make this recipe and enjoy them as much as I do!

3 cups all-purpose flour
2 tbsp baking powder
¼ cup sugar, plus extra for sprinkling over the tops
¼ tsp salt
1/3 cup vegetable oil
½ cup soy cream (soy/rice milk is a fine substitution)
¾ cup rice or soy milk plus 2 teaspoons apple cider vinegar

Preheat oven to 400 degrees. Lightly grease or line a baking sheet.
In a mixing bowl, sift the flour, baking powder, sugar, and salt together. Add the oil, soy cream, and rice milk. MIx until just combined. The dough should be clumpy and not sticky. If there is still a little bit of flour left over, thats okay.
Drop by ¼ cupfuls onto the baking sheet and sprinkle with a bit of sugar. Bake for 12-15 minutes, until slightly browned on the bottom and firm on the top.

Variations:
Berry Scones (pictured above): Fold in 1½ cups fresh berries
Chocolate Chip scones: Add 1 tsp vanilla extract to the liquid ingredients, add 2 tbsp sugar to the dry ingredients, and fold in 1 cup chocolate chips.
Maple Walnut: Add 2 tsp maple extract to the liquid ingredients, add 2 tbsp sugar to the dryr ingredients, and fold in 1½ cups of walnuts.

Recipe from: Vegan With A Vengeance by Isa Chandra Moskowitz

Wednesday, June 24, 2009

Red Velvet Cake


My brother, Will, is not a baker. He is also not cook. He never has been. Sometimes he sautés onions and garlic together to eat over pasta, but that's about the extent of his kitchen skills- or so I thought. My mom and I were shocked when he went to the grocery store yesterday (thats a shocker to begin with!!) and came home with a bunch of ingredients for some kind of dessert. He wouldn't tell us what it was, but, whatever it was, he wanted to make it completely by himself. My brother ended up baking one of the best red velvet cakes I have ever had in my life completely from scratch.

Red Velvet Cake:
Vegetable oil for the pans
2 ½ cups all-purpose flour
1 ½ cups sugar
1 teaspoon baking soda
1 teaspoon fine salt
1 teaspoon cocoa powder
1 ½ cups vegetable oil
1 cup buttermilk, at room temperature
2 large eggs, at room temperature
2 tablespoons red food coloring (1 ounce)
1 teaspoon white distilled vinegar
1 teaspoon vanilla extract
Crushed pecans for garnish

Cream Cheese Frosting:
1 pound cream cheese, softened
4 cups sifted confectioners' sugar
2 sticks unsalted butter (1 cup), softened
1 teaspoon vanilla extract

Preheat the oven to 350 degrees F. Lightly oil and flour 2 round 9-inch cake pans.
In a large bowl, sift together the flour, sugar, baking soda, salt, and cocoa powder. In another large bowl, whisk together the oil, buttermilk, eggs, food coloring, vinegar, and vanilla.
Mix the dry ingredients into the wet ingredients until just combined and a smooth batter is formed.

Divide the cake batter evenly among the prepared cake pans. Place the pans in the oven evenly spaced apart. Bake, rotating the pans halfway through the cooking, until the cake pulls away from the side of the pans, and a toothpick inserted in the center of the cakes comes out clean, about 30 minutes.
Remove the cakes from the oven and run a knife around the edges to loosen them from the sides of the pans. Let cool completely in the pans. Once cooled, carefully turn the cakes out onto separate plates or cooling racks.

To make the frosting, mix the cream cheese, sugar, and butter with a mixer on low speed until incorporated. Increase the speed to high, and mix until light and fluffy, about 5 minutes. Occasionally scrape down the sides of the bowl. Reduce the speed of the mixer to low. Add the vanilla, raise the speed to high and mix briefly until fluffy, occasionally scraping down the bowl. Store in the refrigerator until somewhat stiff, before using.

To frost the cake, place 1 layer, rounded-side down, in the middle of a cake stand or plate. Spread some of the cream cheese frosting over the top of the cake. Spread enough frosting to make about a 1/4 to 1/2-inch layer. Top with the remaining layer and cover the entire cake with the remaining frosting. Sprinkle the top with the pecans.

Recipe by: Cakeman Raven, Cakeman Raven Confectionery, NYC

Monday, June 22, 2009

Chocolate Caramel Puffs


On Sunday, I had my whole afternoon free and was looking for a challenge, so I searched for difficult recipes online. When I came across this recipe for chocolate caramel puffs, I knew I had found the challenge I was looking for. It combines two difficult recipes, one for homemade caramel and the other for a choux pastry, into one magnificent dessert. The fluffy, lighter-than-air chocolate pastry is filled with a rich chocolate and caramel ganache. If that doesn't scream "chocolate lovers' fantasy", then I don't know what does.
However, this recipe is not for the inexperienced baker or for those who are pressed with time. If you are confident in your baking skills and don't have any major plans for a few hours (and are up to the challenge), then this recipe may be for you.

Pastry:
½ cup all-purpose flour
2 tablespoons unsweetened cocoa powder
½ cup water
4 tablespoons unsalted butter
1 tablespoon granulated sugar
3 large eggs

Chocolate Caramel Ganache:
8 ounces semisweet chocolate, chopped
4 ounces unsweetened chocolate, chopped
1 ½ cups heavy cream
2 tablespoons unsalted butter
½ cup granulated sugar
¼ teaspoon fresh lemon juice

Pastry:
Preheat the oven to 375 degrees. Sift together the flour and cocoa powder into a bowl or large piece of wax paper. Set aside until needed.
Heat the water, butter, and sugar in a 3-quart saucepan over medium-high heat. When the butter has melted and the mixture is hot, stir to dissolve the sugar. Bring the mixture to a boil, then remove from heat and add the flour mixture. With a wooden spoon, stir until the flour is completely incorporated and mixture comes together in a ball. Then add the eggs, one at a time, and stir vigorously to thoroughly incorporate each egg before adding the next. (At first, the eggs won't want to combine, but if you keep mixing energetically, they will eventually incorporate)
Scoop into level tablespoons and place on 2 non-stick baking sheets, 12 evenly spaced portions per sheet. Place the sheets on the top and center racks of the preheated oven and bake for 20 minutes, rotating the sheets and turning them 180 degrees around halfway through. Remove the puffs from the oven and cool to room temperature.

Chocolate Caramel Ganache:
Place the chopped chocolate in a large bowl and set aside.
Heat the heavy cream and two tablespoons butter in a medium saucepan. Bring to a simmer, then lower the heat to keep the cream hot, but not simmering until needed.
Combine the sugar and lemon juice in a 3 quart saucepan. Stir with a whisk to combine. Caramelize the sugar over medium-high heat for about 7-8 minutes. Use your best judgement with the temperature and time to keep it from burning. Sometimes, I have to remove the mixture from the heat and whisk vigorously to keep it from burning, then replace it on the heat again. When the sugar is light brown and smooth, remove from heat. Bring the cream to a simmer again***, then carefully add one ladle-full of the hot cream to the caramelized sugar. Use a wooden spoon to stir the caramel until it stop bubbling.
(If your cream is not hot enough, the caramel will harden into a ball and will not combine with the cream. If this happens, put the mixture back on the stove and heat until the caramel is melted again, and stir until it combines with the cream. Be careful not to let it burn).
Add the remaining cream and stir until smooth. Immediately pour the hot caramel over the chocolate and allow to stand for 5 minutes before stirring. Stir the mixture until smooth and shiny. Refrigerate the ganache until just slightly firm, but not too hard. If the ganache is too firm, it will be difficult to fill the pastries with it.

With a sharp knife, cut each puff in half horizontally. Fill the bottom half of each puff with about 1 tablespoon of ganache and sandwich the top half of the puff onto the bottom half.

Recipe from: Marcel Desaulniers

Sunday, June 14, 2009

Aloo Mutter


Cooking Indian food can seem intimidating at times, and sometimes it really is. However, this dish is pretty simple. Even though its pretty quick and easy to handle, it certainly doesn't lack flavor. The cumin gives the curry a bold base while the turmeric adds beautiful color and appealing aroma. This dish is warm and hearty, and is sure to please almost anyone.

1 tbsp vegetable oil
1 tsp whole cumin seed
½ cup sliced red onion
2 medium tomatoes cut into 1-inch pieces
1 tsp salt
½ tsp ground cayenne pepper
¼ tsp ground turmeric
3 medium red potatoes, about 1 pound
1 cup frozen peas
1 cup water
2 tbsp finely chopped cilantro
½ tsp Garam Masaala

Cut the potatoes into about 2-inch pieces and cook until almost done, around 7 minutes. Remove from the hot water into a colander and run cold water over the potatoes until they are cooled.
Add the oil to a 2 quart saucepan and add the cumin seed. Heat over medium to medium-high heat and let the cumin sizzle for about 15-30 seconds, making sure the pan does not become too hot. Carefully add the onions (if the pan is too hot, the oil may splatter) and stir fry until they are golden brown. Add the tomatoes, salt, cayenne pepper, and turmeric. Stir fry until the tomatoes are softened.
Stir in the remaining ingredients except the Garam Masaala. Heat to boiling, then reduce heat to medium. Cover and let the curry simmer for about 5 minutes, then uncover and let simmer for 5 more minutes, until the sauce has slightly thickened. Add the Garam Masaala when you are ready to serve.

Recipe from Betty Crocker's Indian Home Cooking by Raghavan Iyer

Long Rise Pizza


This week was the first full week of summer break and now that I have all this extra time, why not make long rise pizza dough? When I first made this dough, I didn't anticipate how long it would actually take. I started mixing it together about 4 in the afternoon, but the pizza wasn't ready until around 10 that night! Late night pizza is a great summer meal for us night-owls because we can stay up late and sleep in. However, if you're a morning bird, I would suggest starting the pizza dough in the morning. That way, it will be ready by dinner time. Either way, this dough is just as easy as any other pizza dough, but richer. The great flavor comes from the sponge and the long rising time.

Sponge:
¼ cup warm water
1 tbsp quick rise, or one ¼ oz. package active dry yeast
¼ cup all purpose or bread flour.

Dough:
1¾ cup warm water
1 tbsp plus 2 tsp olive oil
1 tsp salt
4¾ to 5¾ cups all purpose or bread flour

Pizza:
Dough
Desired Sauce and Toppings
Cornmeal

To make the sponge:
Combine the ¼ cup warm water, yeast, and ¼ cup flour in a large mixing bowl and allow to sit for 20-30 minutes. The more time the sponge has to sit, the more flavor there will be in the dough.

To make the dough:
Add the water to the sponge and stir with a whisk until the sponge is completely broken up and dissolved into the water. Add 1 tablespoon of olive oil and stir to blend. Add the salt and stir until it dissolves.
Add the flour, one cup at a time, mixing well after each addition until 4¾ cups have been added. Turn the dough out onto a lightly floured work surface and knead until the dough is smooth and elastic.
**If the dough is too sticky to work with, add a little more flour. However, be careful never to add too much flour to the dough. Too much flour will create a dense and tough rather than a light and fluffy crust. It's better that the dough be a little on the sticky side rather than on the dry side**

Once the dough is smooth, shape it into a ball. Add the two teaspoons of olive oil to a LARGE bowl and put the dough in the bowl, turning it to coat completely with oil. Cover with a damp towel and let it rise in a warm place for 5-8 hours.
**yep, 5-8 hours. During that time, the dough will almost triple in size and develop the rest of its rich flavor!**

5-8 hours later, preheat the oven to 500 degrees.
Punch down the dough and turn it onto a LIGHTLY floured work surface. Divide the dough into halves or thirds, depending on how thick/thin you like your crust or how big you are making your pizza. Shape each portion into a disk and cover with a damp towel while you prepare your sauce and toppings.
**From here, you can wrap the dough in a plastic bag and freeze it. Remember to remove dough from the freezer about 45 minutes before using it**

Coat your pizza pan with a thin layer of cornmeal. This will prevent the dough from sticking to the pan. Place your dough disk in the middle of your pizza pan and spread it out using your fingers, do not roll with a rolling pin. On the edges, pull about an inch or two of dough over the edge and roll it over itself, creating the rolled outer border. Poke small holes in the crust with a fork to prevent it from puffing while it's baking. Bake your pizza until the crust is almost done, 5-10 minutes, depending on the thickness of your dough.
Take out of the oven, add your desired sauce and toppings and return to the oven until the cheese has melted.

Recipe based off of "Long Rise Pizza Dough" from The Doughmakers Cookbook by Bette Laplante and Diane Cuvelier.

Saturday, May 23, 2009

Gingerbread Blondies


Blondies are fundamentally the same as brownies; but the difference is that brownies always have a chocolate base and blondies don't. Blondies can have anything from a sugar cookie-like base to an almond or peanut flavored base, and, like brownies, they can contain chunky mix-ins. These blondies are made with gingerbread spices, and white and bittersweet chocolate chunks. The contrast of the white chocolate to the bittersweet chocolate adds depth and an unexpected, but delicious, bite of bittersweet.

2¾ cups plus 1 tbsp all-purpose flour
1¼ tsp baking powder
1¼ tsp salt
1¼ tsp ground cinnamon
1 tsp ground ginger
¼ tsp ground cloves
2½ sticks room temperature butter
1¼ cups brown sugar
½ cup plus 2 tbsp white sugar
2 large eggs plus 1 egg yolk
1¼ tsp vanilla
1/3 cup molasses
8 oz. coarsely chopped white chocolate
2 oz. coarsely chopped bittersweet chocolate

Preheat oven to 350 degrees. Spray a 12x17-inch baking sheet with cooking spray and then line with aluminum foil. Whisk flour, baking soda, salt, and the spices in a bowl. In a separate bowl, beat butter and brown and white sugar on medium speed until creamy and pale, about 3 minutes. Add eggs and yolk one at a time and mix until blended. Add the vanilla and molasses and mix until combined. Stir in the flour mixture until combined, then stir in the chocolate.
Spread the batter evenly into the prepared pan, but be patient. This may take a while because the batter is so thick and the pan in so big. Bake until the edges just start to pull away from the sides, about 25 minutes.

Recipe adapted from Martha Stewart's Cookies
Makes about 4 dozen.

Cardamom Cookies


Similar to Indian Chai, cardamom cookies get their flavor from cinnamon and, as the name says, cardamom. They are soft and chewy, and are complemented with perfect spiced icing. Cardamom cookies taste so much like Chai that, when I made these for my friends, they called them Chai cookies. These cookies are perfect with a scoop of ice cream or alongside a hot cup of tea.

for cookies:
½ tsp baking soda
1 tsp ground cardamom
1 tsp ground cinnamon
1 ½ cups flour
1 cup sugar
1 stick butter, room temperature
1 egg

for icing:
½ stick butter, room temperature
½ tsp vanilla
¼ cup milk
¼ tsp ground cardamom
¼ tsp ground cinnamon
2 cups powdered sugar

Preheat oven to 350 degrees. Line baking sheet with parchment paper.
Whisk together baking soda, cardamom, cinnamon, and flour. Set aside. In a large bowl, beat sugar and butter until creamy, about 2 minutes. Add egg and beat until thoroughly combined. Reduce speed to low, add flour mixture and beat until just combined. Roll dough into balls and transfer to prepared baking sheets, spacing dough about 2 inches apart. Carefully press dough with a flat edge and bake until lightly browned, 14-16 minutes. Remove from oven and let the cookies cool completely. Remember, these cookies will be iced with a frosting that contains butter. If the cookies are still hot, the butter will melt and the icing won't hold up. It will just melt away!
In a large bowl, beat butter and vanilla until light and fluffy. Add milk, cardamom, and cinnamon and beat well. Reduce speed and add powdered sugar. Spread icing on cooled cookies.

Recipe from Matt Boisen of Owatonna, MN.

Saturday, May 16, 2009

Double Chocolate Brownies


My grandparents, who live in Indiana, came up to Minnesota to see my play this spring. Whenever family comes up to stay with us, we always like to have baked treats around the kitchen. It always seems to make a house feel warm and welcoming. So, we decided to bake these double chocolate brownies. Who doesn't like a warm, fudgy brownie for a snack or after dinner? Brownie Lovers: this is the recipe of your dreams.

6 tbsp unsalted butter
6 oz semisweet chocolate chips
1/4 cup unsweetened cocoa powder
3/4 cup flour
1/4 tsp baking powder
1/4 tsp salt
1 cup sugar
2 large eggs
2 tsp vanilla

Preheat oven to 350 degrees. Line a greased or buttered 8x8-inch square baking pan with parchment paper, allowing an overhang. Grease or butter the parchment paper.
Put butter, chocolate, cocoa powder in a heatproof bowl set over a pan of simmering water- but don't let the bowl touch the water. Stir until the butter and chocolate have melted. Let cool slightly. Whisk flour, baking powder, and salt in a separate bowl. Put sugar, eggs, and vanilla in a separate bowl and beat until the mixture is pale, about 4 minutes. Add the chocolate mixture and mix until combined. Reduce speed to low and add the flour mixture, scraping down the sides of the bowl.
Pour batter into the prepared pan, and spread evenly with a spatula. Bake until a cake tester inserted into the brownies comes out with a few crumbs but is not wet, about 35 minutes. Let cool slightly in pan for about 15 minutes. Lift the brownies out of the pan with the overhang of the parchment paper. Peel off the parchment paper.

Recipe adapted from Martha Stewart's Cookies.

Pumpkin Cookies


For the past four months or so, I was in West Side Story at my school- which explains my lack of postings over the past month or so. During that time, this play became the primary focus of my life. Practice was every day for about 6 hours a day, and started right after we got out of school. The cast really grew together and became one big family. On one of the last shows, I made these pumpkin cookies for the cast. Needless to say, they were a hit!

2¾ cups flour
1 tsp baking powder
1 tsp baking soda
1¼ tsp salt
1½ tsp cinnamon
1¼ tsp ginger
¾ tsp nutmeg
1½ sticks room temperature butter
2¼ cups brown sugar
2 eggs
1½ cups canned pumpkin
¾ cups evaporated milk
1 tsp vanilla

Preheat oven to 375 degrees. Whisk flour, baking powder, baking soda, salt, cinnamon, ginger, and nutmeg together in a bowl. In a separate bowl, mix butter and brown sugar on medium speed until light and fluffy, about 3 minutes. Mix in eggs. Reduce speed to low and add the pumpkin, evaporated milk, and vanilla. Mix until well blended. Add flour mixture and mix until combined.
Put about half the batter in a pastry bag (or a ziplock or plastic bag with the corner cut off about ¾ inch up). Make 1½ inch sized cookies from this onto parchment-paper lined baking sheets, spacing them about 2 inches apart. Bake cookies, rotating sheets halfway through, for about 12 minutes.

Recipe from "Martha Stewart's Cookies"

Sunday, April 19, 2009

Lemon Bars


I am a die-hard lemon bar fan and, to me, most lemon bars served at bakeries and restaurants taste more like sugar than they do lemon. Either that, or the crust takes over the entire dessert. Don't get me wrong, lemon bars should be sweet, but not more so than they are lemony. And I'm not saying they shouldn't have a crust. They need a crust, but it should be soft and flaky, and serve to balance the richness of the filling, rather than overpower it. This recipe is the perfect version of a great lemon bar, and a generous coating of powdered sugar over the top balances the intensity of the lemon.

crust:
1 1/2 sticks frozen butter
1 3/4 cup flour
3/4 cup powdered sugar
3/4 tsp salt

filling:
4 eggs
1 1/3 cups sugar
3 tbsp flour
1/4 tsp salt
3/4 cup lemon juice
1/4 cup whole milk
Powdered sugar for dusting

Preheat the oven to 350 degrees. Line a 9 by 13-inch baking sheet with aluminum foil.
Grate the butter on a cheese grater with large holes and set aside. Whisk together the flour, powdered sugar, and salt in a large bowl, then add the butter and stir with a wooden spoon until combined and crumbly. Transfer the mixture to the baking pan and press evenly onto the bottom with your hands. Freeze the crust for about 15 minutes. Bake until slightly golden, 16-18 minutes. Leave the oven on.
While the crust is baking, whisk the eggs, sugar, flour, and salt in a bowl. Stir in the lemon juice and milk. When the crust comes out of the oven, pour the mixture over the hot crust and return to the oven. Reduce heat to 325 degrees and bake until the filling is set (no longer jiggles when the pan is gently moved), about 18-20 minutes. Let cool on a wire rack. When cool, lift the edges of the aluminum foil to pull the bars out of the pan. Cut into squared and dust with powdered sugar.

Recipe from: Martha Stewart's Cookies.

Oatmeal Raisin Bars


This version of a dried fruit bar is more rustic than other traditional recipes. They have a crumbly oat and brown sugar streusel-like topping that is pressed onto the bars before they bake. The original recipe says to puree the raisins and sugar before you cook them over the stove. However, when I tried to do that in my food processor, the mixture just spun around. It neither combined nor processed. So, in my version, I processed the raisin mixture AFTER it was cooked over the stove- creating a rich, gooey, and smooth filling.

filling:
2 cups raisins (about 13 oz)
1 cup sugar
1 tsp cornstarch
1 cup cold water
1/2 cup apple cider**

dough:
2 1/2 cups flour
1 1/4 tsp baking soda
1 1/4 tsp salt
1 1/4 cups vegetable shortening
1 1/4 cups packed brown sugar
1 egg
1 1/4 tsp vanilla
2 1/2 cups old-fashioned rolled oats

Preheat the oven to 350 degrees. Line the bottom of a 10 by 15-inch rimmed baking sheet (or a jelly-roll pan) with parchment paper.
Mix the raisins and sugar together in a saucepan. Whisk cornstarch into the cold water, then whisk into the raisin mixture. Stir in cider. Bring the mixture to a boil, then reduce heat to medium and let it cook until the mixture has thickened and the sugar has dissolved, about 15 minutes. Stir occasionally. Let the mixture cool completely. When cool, puree the raisin mixture in a food processor until it has a smooth consistency and can be evenly spread. Put back into the bowl and set aside.
Whisk together the flour, baking soda, and salt in a bowl. Put shortening in a bowl and mix on medium speed until smooth. Add brown sugar and cream the mixture until pale and fluffy, about 2-3 minutes. Add the egg and vanilla, and mix until combined. With a large plastic spoon, stir in the flour mixture in 2 parts. Mix until just combined. Then add the oats and mix with your hands to make sure the it is thoroughly incorporated (and to keep your spoon from breaking- the mixture is thick!).
Press half the dough into the prepared baking sheet- making sure to cover the whole pan. Spoon the raisin filling over the top of the dough. Crumble the rest of the dough over the top with your fingers, gently pressing down so that topping covers and sticks to the filling. Bake, rotating sheet halfway through, until the top is golden brown, about 35 minutes. Let it cool completely on a wire rack. Cut into squares and enjoy!

**If you don't have apple cider on hand, just mix 1/2 cup apple juice with a pinch each of: cinnamon, cardamom, ginger, and nutmeg. Nobody will know the difference!

Recipe from: Martha Stewart's Cookies

Saturday, April 18, 2009

Hot Cross Buns


Hot Cross Buns have been a traditional Easter treat for generations; and for good reason! They are light, fluffy, and have a little bite of sweetness from the raisins and icing. The secret to keeping the hot cross buns light and fluffy is making sure you let it rest and rise for enough time. If you don't, gluten in the bread will form and make the dough tough.
Hot Cross Buns are delicious along side morning coffee as well as after dinner. Since the recipe below makes 6 dozen buns, I made 1/4 of the recipe and still had enough to give away!

4 ( 1/4 oz. each) packages active dry yeast
3 cups warm milk (110-115 degrees)
2 cups canola oil
8 eggs
4 eggs, separated
1 1/3 cups
4 tsp cinnamon
3 tsp salt
2 tsp cardamom
13-15 cups flour
2 2/3 cup raisins
2 tsp water

icing:
3 cups powdered sugar
2 tbsp butter, melted
4-5 tbsp milk


In a very large bowl, dissolve the yeast in warm milk. Add the oil, eggs, egg yolks from separated eggs, sugar, cinnamon, salt, cardamom, and 10 cups of the flour. Beat until combined and smooth. Stir in enough of the remaining flour to form a firm dough, then stir in the raisins. Knead the dough on a floured surface until it is smooth and elastic, about 6-8 minutes. Then, place in a large buttered bowl, cover with plastic wrap, and let it rise in a warm place until doubled in size, about 1 hour and 20 minutes.
Punch the dough dough and turn it onto a lightly floured work surface. Cover and let it rest for 10 minutes. Divide into 72 pieces and shape each into a ball. Place them two inches apart in four buttered 15-inch by 10-inch by 1-inch baking pans. Cover and let rise in a warm place until doubled in size, about 40 minutes. Combine egg whites and water; brush over rols.
Bake at 375 for 12-15 minutes or until the rolls are golden brown. Remove from pans and cool completely in wire racks.
For icing, combine powdered sugar, butter, and enough milk to make your desired consistency. Pipe an "X" on the top of each bun.

Recipe from: Taste of Home Magazine

Saturday, April 11, 2009

Chai: Indian Tea


My family and I love ethnic food, but we have always had a special relationship with Indian food. We love the way spices work together with the flavors of the food to enhance the food itself, rather than overpower it. I have eaten Indian food ever since I can remember, and I have vivid memories my parents drinking Chai. Chai is a kind of Indian tea that is made up of a combination of spices brewed in milk. It is served at nearly every social gathering in India after a meal. I didn't try chai until I was around 8 years old, but when I did, I was so surprised with the combination of spices that make up such a rich and creamy tea. Chai is perfect for warming up cold winter nights, but is also pleasantly refreshing when cooled and served over ice.

2 cups water
1/4 cup loose Darjeeling tea leaves, or 5 tea bags black tea
2 cups whole milk, or 2% milk
1/8 tsp cardamom
2 whole cloves, crushed
2-4 black peppercorns, crushed
pinch of ground cinnamon
1/4 cup sweetened condensed milk, or more to taste

Heat the water to a rapid boil in a 2-quart saucepan over medium-high heat. Reduce heat to low and add the tea leaves. Let them simmer for 2-4 minutes to blend the flavors. Strain out the tea leaves or bags and return tea to saucepan. Stir in the milk, cardamom, cloves, peppercorns, and cinnamon. Heat to boiling, then reduce heat to medium low. Be careful not to let the milk boil over- it will boil up high in the pan. Stir in the condensed milk. Then strain into a teapot and serve hot, or strain into a pitcher and refrigerate, then serve cold over ice.

Recipe from: Betty Crocker's Indian Home Cooking; Recipe by: Raghavan Iyer

Sawatdee


Supenn Harrison, the owner and creator of Sawatdee, came to Minnesota from Thailand as a student in 1972. Eleven years later, Suepenn opened the first Sawatdee in St. Paul, Minnesota. Sawatdee serves only the freshest authentic Thai cuisine.
"A typical Thai meal consists of lots of jasmine rice served with several different dishes served family-style at the same time. The different flavors and textures contribute to the balance of salty, sweet, sour, and spicy. The complement of dishes might include a soup, a spicy curry, a stir-fried vegetable dish, and fried or steamed fish. The typical desert would be fresh fruit such as papaya, grapes, rumbutan, or mangos, whatever is in season. Each person starts with rice on his or her plate. Then they help themselves to a spoonful of one dish, eat that with rice, then a spoonful of another. This allows people to savor each unique taste and texture" (Sawatdee Cookbook by Supenn Harrison).
Sawatdee offers appetizers like spring rolls, a very spicy papaya salad, egg rolls, cream cheese puffs, and chicken satays. The soups and salads include tofu soup, silver thread noodle soup, Lob Esan, and-my favorite-Toam Yum soup. The entrees are made with fresh, authentic Thai ingredients and fresh meats. They vary from spicy curries to Pad Thai. Almost all entrees can be made with your choice of tofu, chicken, shrimp, or beef, and are made at the spice level you want. Even the desserts pack flavor of Thai cuisine in every bite! This restaurant has 8 different locations across Minnesota- all of which will completely satisfy your cravings for authentic Thai cuisine.

Pictured above: Toam Yum Soup with Chicken.

Friday, April 10, 2009

Vanilla Bean-Coconut Cupcakes with Coconut Frosting


Coconut is one of the best things in the world. It's tropical, sweet, and is so versatile, it can be used in almost anything! Coconut gives macaroons their flavor and an interesting twist to Brazilian Brigageiros. Coconut milk can be used in cakes as well as curries and a lot of Thai food. These vanilla and coconut cupcakes are just one easy way to use this versatile food. The reduced coconut milk keeps these cupcakes super moist and adds a richness to which regular milk could not compare.

To make reduced coconut milk:
2 13- to 14-oz. cans unsweetened coconut milk


2 cups all purpose flour
2 1/4 tsp baking powder
1/2 tsp salt
3/4 cup (1.5 sticks) unsalted butter, room temperature
1 1/2 cups sugar
3 eggs
Seeds scraped from 1 split vanilla bean, or 1 1/2 tsp vanilla extract
1 cup reduced coconut milk

1 cup unsalted butter, room temperature
2 1/2 cups powdered sugar
1/3 cup reduced coconut milk
seeds scraped from 1 split vanilla bean, or 1 1/2 tsp vanilla extract

For reduced coconut milk, bring the coconut milk to a boil in a large deep sauce pan over medium-high heat. Be careful with this because the coconut milk will boil high up in the pan. Reduce the heat to medium low and boil until it is reduced to 1 1/2 cups. Stir occasionally and let it boil for 25 to 30 minutes. Remove from heat and cool completely.

Preheat oven to 350 degrees. Line mini muffin cups with paper liners. Whisk flour, baking powder, and salt in a medium bowl. Using an electric mixer, beat butter in a large bowl until smooth. Add sugar, beat on medium-high speed until well blended, about 2 minutes. Add 2 of the eggs, 1 at a time, beating well after each addition. Beat in seeds from the vanilla bean and the remaining egg. Add half of the flour mixture and mix together on low speed until blended. Add 1 cup of reduced coconut milk and mix until blended. Add remaining flour mixture and mix on low speed until blended. Divide batter among mini-muffin cups- filling each about 2/3 of the way up.
Bake cupcakes until tops spring back when gently touched, about 12-15 minutes. (20 minutes if you are using regular-sized muffin cups) Let the cupcakes cool in their pans for about 10 minutes, then remove from pans and let them cool completely on wire racks.
For the frosting, Beat butter in a large bowl until smooth. Add sugar, 1/3 cup reduced coconut milk, and seeds from the vanilla bean. Beat on medium-high speed until the frosting is light and fluffy. Fill a large, plastic bag with the frosting- pushing it all down to one bottom corner. Cut the end of the corner off (not more than 1/2 inch, not less than 1/4 inch) and pipe the frosting onto the cooled cupcakes. Alternatively, top each cupcake with desired amount of frosting. Using a small knife, swirl frosting over the tops of the cupcakes.
Store in airtight containers

Recipe from Bon Appetit Magazine

Almond & Honey Cookies


You know when you come home from a hard day of work, practice or rehearsal and your sweet tooth seems to be as big as a semi-truck? I sure do. To me, nothing sounds better than cookies when I come home from a late rehearsal. But I realized that all these cookies I've been eating really aren't doing anything good for me. So I was ecstatic when I came across these Almond and Honey Cookies! The almonds stand in for much of the butter that would be used, and honey is the only sweetener. They contain only 1 gram of saturated fat while having 2 grams of protein. These cookies are so good- and good for you- that you won't need to hesitate before having seconds.

1 cup whole almonds
1 1/4 cup whole wheat flour
1 cup all purpose flour
1 tsp baking powder
1/2 tsp salt
2/3 cup honey
4 tbsp unsalted butter
1 egg
1 tsp vanilla

Preheat the oven to 350 degrees. Put the almonds on a baking sheet and let them toast for about 7-9 minutes. You should be able to smell their fragrance. It smells a little like almonds and a little like popcorn. Process these almonds in a food processor or blender until finely ground. You will have about 1 1/4 cups ground almonds. Transfer to a large bowl and add flours, baking powder and salt. Stir until combined. In another medium bowl, beat honey, oil, and butter in a mixing bowl until well combined. Add the egg and vanilla and beat until blended. Add the wet ingredients until the dry ingredients and stir to combine. Refrigerate for about 1 hour.
Line two baking sheets with parchment paper. Roll tablespoons of dough onto the baking sheets and place about 2 inches apart from each other. Bake the cookies until they are set and barely golden brown, about 13 to 15 minutes.

Recipe from Eating Well magazine

Sunday, April 5, 2009

Orange Angel Food Cake


Angel Food cake is not easy, I know. But this fluffy, decadent dessert is well worth the effort and sure to impress. Try out this orange-infused treat and let it speak for itself. The cake looks so simple and elegant, but eaters will be amazed by the rich flavor it holds in such a light cake.
Make sure not to use a pan with a non stick coating, and don't grease it! The cake is cooled upside down, so it needs to stick to the sides a bit.

1 1/4 cups powdered sugar
1 cup cake flour
1/4 tsp salt
1 1/3 cups egg whites
1 1/2 tsp cream of tartar
1 cup superfine sugar
1 tbsp finely grated orange zest (I recommend Naval oranges)
1 1/2 tsp vanilla extract

Preheat the oven to 350 degrees. Sift the powdered sugar, flour and salt 3 times. Then place in a medium bowl. Using an electric mixer, beat the egg whites until they are foamy. Add the cream of tartar and beat until the eggs turn opaque and soft peaks form. Gradually add the superfine sugar and beat until the whites are thick and shiny with fluffy peaks that droop gently. Add the orange peel and vanilla and beat just until they are blended. Sift 1/4 of the flour mixture gently over the egg whites. Using a large rubber spatula, gently *FOLD* the flour mixture into the whites. Repeat with the rest of the flour in 3 more additions. Gently transfer batter to an ungreased 10 inch diameter angel food cake pan with a removable bottom and at least 4-inch sides. Smooth the top of the batter with your spatula.
Bake the cake until it is golden with a crackled crust on the top and it springs back to the tough, about 50 minutes. Immediately invert the center tube of the pan onto the neck of a bottle or funnel. Cool the cake completely.
Once the cake is cool, cut along the outside of the cake to remove the sides of the pan. Then cut around the bottom of the cake and the center tube to release it from the bottom part of the pan. Invert the cake to a platter so that what was once the bottom of the cake now faces up.
This angel food cake is excellent with fresh fruit or a scoop of ice cream!

**Do NOT stir the batter once the egg whites have been whipped. The key to such a light and fluffy cake is that the egg whites are as fluffy as possible without being too much so. Stirring will deflate the air bubbles. Don't know how to fold? Insert your rubber spatula into the center of the batter and gently bring it around to the bottom and then up the side, to the top- bringing the batter with it. Turn the bowl as you slowly repeat this until the flour is incorporated. The key here is gentle- and not to over mix and deflate!
Recipe from Bon Appetit magazine.

Jarlesberg Gougeres


Jarlesberg Gougeres- it looks like hieroglyphics. Translation: the perfect cheese puff for an appetizer or dipping in soup.
As I re-read the recipe before I started cooking, I looked over at my mom who was making soup beside me and said, "Mom, I'm scared". They seemed so intimidating at first- cooking a dough over the stove and then adding eggs while it's still hot. I was certain the flour would burn, and the eggs would curdle and I would end up with scrambled eggs. However, neither happened. Not even close. The only product of my work was a perfectly light cheese puff- so light, it seems it could float away with the spring breeze. The outside was golden brown and crisp, but the inside was airy and moist. What most surprised me though, was how amazingly easy these were to make.
Classic Gougeres are made with Gruyere cheese. But, since I couldn't find any at the store today, I substituted Jarlesberg cheese for Gruyere. The flavor of the Jarlesberg is perfectly salty with a slight tang- but all the burst of cheese.

1 cup water
3 tbsp butter, diced
3/4 tsp salt
1 cup all purpose flour
4 large eggs
1 cup packed grated Jarlesberg cheese (approx. 4 oz)
1/4 tsp freshly ground black pepper

Put one oven rack in the top third and one in the bottom third of the oven, and preheat to 400 degrees. Line 2 rimmed baking sheets with aluminum foil.
In a medium saucepan over medium heat, bring the water, butter, and salt to a simmer. Whisk the mixture until the butter melts. When it comes to a simmer, add the flour and stir rapidly with a wooden spoon until the flour absorbs the liquid and forms a ball that pulls away from the sides of the pan. Stir this vigorously until a film forms on the bottom of the pan and the dough is no longer sticky, 1-2 minutes longer. Remove the pan from heat and let it cool about 3-4 minutes. With an electric mixer, mix in one egg at a time. The mixture will look separated at first, but keep mixing- the eggs will incorporate. Stir in the cheese and pepper.
Drop rounded tablespoons of dough onto the baking sheets about 3 inches apart. Bake the gougeres until golden brown, about 30 minutes depending on their size. Reverse the positions of the sheets halfway through baking. The gougeres are done when the outsides are golden brown and when you pry a knife into the middle, you see a slightly moist center.

Recipe from Bon Appetit Magazine

Saturday, April 4, 2009

Florida Guacamole


My family and I took spring break to Captiva Island in Florida this week! On our first day there, we took an outing to a small, local grocery store to get food and snacks for the week. As we were walking through the produce section, my brother and I spotted what looked like giant green avocados. After a look at the label, we discovered that they came from the Dominican Republic. These looked just like avocados, except they were lime green, rather than black. They were about the size of a softball, and they were the most perfectly ripe avocados I have ever seen- and not one bit too ripe. Upon spotting them, my brother and I immediately decided to buy one and make a giant batch of guacamole! 
Since I still don't know the real name for these, please drop a comment if you do. Although these Dominican Republic avocados aren't available in Minneapolis (or atleast not that I've noticed), two Haas avocados will do just fine!

1 Dominican Republic avocado
2 Roma tomatoes
2-4 cloves of garlic, depending on size and taste
Salt
1 shallot
1 medium Jalepeno pepper
1 lime

Cut the avocado(s) in half and take the seed out by hitting the center of your knife against the seed, so that it stays. Twist your knife until the seed pops out. Then, using your thumb and forefinger, pinch the knife right behind the seed so that it pops away from the knife. 
Remove the meat from the skin with a spoon and chop into small cubes. Place the small cubes in a large bowl. Then, Remove the top and bottom of the tomato as well as the core, making sure all the seeds come out, too. Dice the tomatoes in about 1/2 inch cubes. Add diced tomatoes to the bowl. Peel and mince the garlic. Add a few teaspoons of salt (depending on amount of garlic) to the minced garlic and smear it with your knife. Repeat until the garlic turns to paste. Add this to the bowl. Peel and mince the shallot, then add that to the bowl as well. Chop the top and the bottom of the Jalepeno pepper off, and then cut in half. Remove the ribs of the jalepeno and seeds and throw them away. Then mince the jalepeno and add it to the bowl. Cut the lime in half and juice it over the bowl, being careful not to let the seeds fall into the guacamole. Then, with a potato masher, mash all of the ingredients together to desired consistency. Be sure all the ingredients are evenly mixed, and enjoy!

The best thing about guacamole is how easy it is to alter and create your own recipe. If you want more tomatoes, just chop up more and add them as you go! Add bell peppers, or take out the jalepeno if you want! If you want spicier guacamole, chop up and add the ribs and seeds of the Jalepeno. If you don't like limes, add lemon juice instead! Big fan of garlic? Go crazy with the garlic paste! The only caution I should give is to start out with less, then add more when you're done. It's super easy to add more of an ingredient to this guacamole, but difficult to balance out the flavors if you add too much.

Recipe is my own.

Friday, March 27, 2009

Good Earth

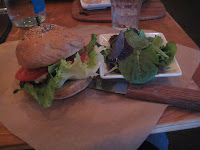
Tonight, I went to the Good Earth restaurant in Edina, MN. At first glance, this restaurant looks relaxed and light, but one look at the menu shows you that this food is nothing to laugh at. With all natural burgers, cage free chicken, spicy curries, "power up" shakes, grilled fish, vegetarian pizzas, and fresh squeezed juices, it's safe to say that the Good Earth satisfies every craving with healthy, natural ingredients. 
Good Earth doesn't take breaks in the mornings, either. Healthy ways to start your day are ready every morning with hot cakes, smoothies, omelets, granola, and even breakfast quesadillas. The Good Earth restaurant scores top marks as healthy, affordable, and just all around tasty.
"Planet" (Vegetarian) Burger is pictured
above.  $8.95

www.goodearthmn.com

Raspberry Pinwheels


For the Christmas season this year, my mom decided to make a batch of cookies every few days and freeze what we could not eat. She started at the beginning of December and before we knew it, we had about 12 dozen cookies that we, the kids of the family, had the obligation of eating! Throughout my mom's ambitious winter project, we found numerous tasty cookie recipes that are a treat all year round. One of my favorites is these Raspberry Pinwheels.

1.5 sticks butter, room temperature
1 8-oz bar of cream cheese, room temperature
1/2 cup white sugar
1/2 tsp vanilla
2 cups flour
1/2 cup seedless raspberry jam
1 large beaten egg
2 tbsp turbinado, or coarse sugar

In a medium bowl, beat the butter, cream, cheese and sugar until fluffy. Then mix in the vanilla. Gradually add the flour and mix until just incorporated. Turn the dough onto a floured work surface and gently knead it two or three times, just to bring everything together. Form the dough into two 1-inch thick squares, wrap in plastic wrap or aluminum foil, and refrigerate for at least one hour. On a lightly floured piece of parchment paper, roll one of the dough squared into a 9x12 inch rectangle, shaping it with a knife if necessary. Spread half the jam over the dough. Cut the dough crosswise into thirds, making 3 9x4 inch rectangles. Roll into logs, starting from the long side of each rectangle. Wrap in wax paper and refrigerate until firm, at least 30 minutes. Repeat with the rest of the dough. After 3o minutes, take the dough out of the fridge and slice into 1 inch pieces. Space the pieces about 1.5 inches apart on a parchment paper or aluminum foil lined baking sheet. Brush each piece with the egg and sprinkle with the coarse sugar. Bake until golden and firm, about 20-25 minutes.
Buon appetito!

Recipe from Real Simple Magazine.